Showing posts with label DIY. Show all posts

Friday, July 29, 2011

DIY Friday: Shaving Cream Finger Paint

This week's super easy DIY is from my friend Jennifer!
Here is what she said...


"I bought the cheapest white, foamy shaving cream I could find. I found food coloring in regular colors and neon colors in the clearance aisle at Spillway Kroger for $0.79 for each set of 4. I simply squeezed shaving cream in each cup, let Ford drop a few drops of food coloring in each and stirred. Then we let him paint away in the bathtub cause it was super messy!"


"He really enjoyed painting himself! The food coloring did dye our hands, but after several washings it came off. It was so easy to make a boring night fun!"

Thanks Jennifer & Ford!

Thursday, July 28, 2011

Free Christmas Craft ebook

Sign up for the Christmas Craft Newsletter and download the "6 Adorable Homemade Christmas Crafts for Summer" eBook. You will get presented with other offers, but just hit skip and you'll see the free ebook tab at the top of the page.

Friday, July 22, 2011

DIY Friday: Make a Difference - Girl's Only Project

A friend from a ministry group I help lead sent an email asking for help for her friend who writes at The Farmer's Wife Tells All. So here's your DIY Friday, complete with a tutorial from The Farmer's Wife Tells All: The Girls Only Project. Read about it and I challenge you to make a difference TODAY!

"I'm calling in all my favors right now. If you can type, repost a link, sew, or donate a small amount, I need you!When a young girl starts blossoming into womanhood, it's a scary, awkward, exciting, embarrasing time.
Remembering those years, I can't fathom going through them as an orphan.


I have been praying about what to bring with us to donate to the orphanages in Uganda on our trip in the next couple of months. I spoke with an American friend of mine who is living there and working with an orphanage. I asked what the greatest need was at this orphanage. Her answer shocked me, but made perfect sense.
Panties
Bras
Ibuprofen
Maxi pads


25 young ladies in this orphanage are in need of these basic things every girl should have. I've heard stories of girls missing school, using scraps of cloth or even trash while on their periods.


No girl should have to do such things.
Click here to read more and see the tutorial from The Farmer's Wife Tells All!

Friday, July 8, 2011

DIY Friday - Start a Family Tradition

Rachel and I are at the beach this week with family from literally all over the country, so we thought we would tell you about a fun family tradition we have called "peanut pals." We try to get as many family members together for one week at the beach (some beach) every year. (This year we are in Holden Beach, North Carolina.)

This is what we do:
 - Everybody's name goes into a jar.
 - Everybody draws a name.
 - You buy a gift (around $1) OR you can make a gift.(Gifts are gags or beach themed.)
 - We wrap the gifts in whatever we can find lying  around.
 - We open the gifts the night before we leave to go home.

This tradition started in 1967 at the family beach trip to Jekyll Island, Georgia. It is called "peanut pals" because when this tradition started the amount to spend was $0.10 and a bag or peanuts was a good buy!

This is just ONE of the MANY things I LOVE about our family! I encourage you to start a new tradition and continue with the ones you already have! Here are some of our peanut pal pics from this year!

This is Cam! He got fake cigarettes(candy)!

My awesome peanut pal got me this month's P&G!

This is Sarah! She lives in Shreveport, LA and got a water gun!

Pat lives in Knoxville, TN and got a handmade shell necklace.

Vicki and Mark live in Minnesota. She's originally from Versailles, France. 
She got a Southern "emergency survival kit" complete with grits

Jake got a squeaky frog.
If you have an idea for DIY Friday, please email us at thesavinglife@gmail.com

Tuesday, July 5, 2011

Cutting Clothing Costs

One thing my family does to save on clothing costs is use our Discover Card's Cashback Bonus Program to buy giftcards. I recently used $45 of our "cashback" bucks to purchase a $50 JCPenney Giftcard. There was a sale going on for Father's Day and I got a coupon in the mail for $10 off a $10 purchase. Pairing these two strategies, I got 2 longsleeve button down shirts, a polo style shirt, and khaki pants for $0.23. Yes, you read that right, $0.23!

Friday, July 1, 2011

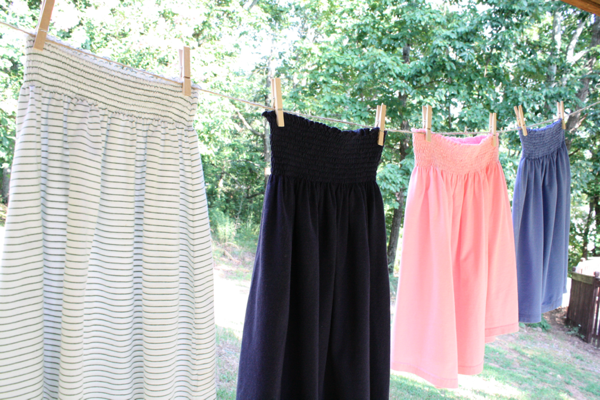
DIY Fridays- Recycle a T-shirt into a skirt!


So So Cute! Saw this on MoneySavingMom and thought you guys would like to do this for DIY Friday!

Sew Like My Mom teaches you how to take a thrift store t-shirt and turn it into a skirt!

Friday, June 24, 2011

DIY Friday #2 - Old to New Crayons!

Have tons of broken crayons laying around you don't want to throw away but have no use for? Or would you just love something different from plain and boring? Well do I have a DIY for you!

These are also great for little hands that can't quite grasp a pencil thin crayon just yet!

Here's what you do:
Divide pile of crayons into separate cups according to color family

Peel paper off of all crayons..

Melt colors in pot

Pour melted wax into molds
Let dry until wax is pulling away from sides. (These should easily pop out)

Place in cute bag to give as a gift or start coloring away!!


 **The Reality:
It's messy and takes a while if you're only using one pot.  Clean up wasn't too bad once the wax dried, I just had to scrape it off with a spatula. 

 But she had so much fun coloring with all her SHOES!


Get some great DIY ideas from the FaveCraft Newsletter! Click the image below!

Favecrafts
Have an idea for DIY Friday?

Friday, June 17, 2011

DIY Friday #1 - Bathtub Soap Crayons

(WARNING - Inform your husband of your soap making!My DH took a bite out of the bottom yellow one in the picture thinking it was a real popsicle! Seriously! He really took a bite!)
Supplies:
■1 cup grated Ivory soap
■Warm water
■4 Bowls
■Food coloring


Instructions:
1 -Have your kids grate a bar of soap, making one cup of soap. (My kids are 2 1/2 and almost 4 and they did this with no problem once I showed them what to do! Use the fine shredder because it mixes better!)
2 -Divide the cup of soap into 4 bowls.

3- Add water and several drops of different food coloring into each bowl, and mix.Encourage the children to stir the mixture until the soap mixture forms a thick dough. Add more water or soap shavings to get the right consistency.(I used 1/4 cup water in each bowl and that was too much! So use 1/2 of a 1/4 - can't get my brain to tell me what that is mathematically!)
4 -Once the dough is firm, have the children shape it into crayons by hand....
or press it into ice cube molds.

5 -Place the soap crayons in the freezer for 10 minutes, and then pop them out of the mold.Let the bath tub soap crayons dry 1 to 2 days.Once ready, let your children color in the tub!

Okay reality for you moms... here is the mess when we were through.

I immediately put the boys in the bath tub with the bowls and spoons they mixed with and told them they had to clean their dishes! I went back to the kitchen and wiped everything down with a rag and then gave the rag to the boys to wash with! After all - it was just soap! We had fun and the clean up was quick!

Thanks, Kiboomu.com, for the instructions!

Have an idea for DIY Friday?

Saturday, April 9, 2011

Felt Doll Board

I Hope you all had a very Merry Christmas.  Around here, Christmas is always quite the adventure.  But I would have to say my most favorite part was making and giving this Dress up felt doll board to my niece, Georgia.


You can find the tutorial here.
I tweaked it just a little in order to use some things i already had, so my board is a little smaller.
I also added fabric to some of the pieces to give the clothes a unique look.


You can also buy printed felt to use to make the "outfit" extra cute! 


I loved this so much and wanted to share~ You may have a little girl of your own to make this for or you might just want to play with  it yourself i caught myself a few times changing the outfits ;)


Come back tomorrow to see what I made the little boys in my life for Christmas :)

Monday, April 4, 2011

Hair Clip

DIY flower hair accessory

Don't throw away your scraps of fabric! I can put them to good use!

Here's a tutorial on how to make your own flower hair clips....


Step 1:  Gather fabric scraps from left over projects, using a spool of thread as a guide, trace circles onto fabric


Step 2: Cut out all circles, matching coordinating fabrics together (I used 4 layers of fabric/flower)


Step 3: Using a button or bead of some sort attach all fabric together.  (Be creative, there's so much you can use here)


Step 4:  Glue or attach with wire to a metal clip.  (I got mine at Hobby Lobby for around $4.00 for a pack of 24)


Step 5:  Wait for glue to dry, and wear!


Flower hair accessories are also available in my shop!

Tutu

Gather materials

around 3 yds Tulle

Scissors

around 1 foot Elastic


around 2 feet Ribbon


Ok go:

Step 1: measure wearers waist with elastic.. Just wrap it around wearer.

(for Piper(11 months) it was 12 inches long) and cut


Step 2: cut 2 12 inch pieces of ribbon and sew to each end of the elastic


(lay aside)


Step 3: now take your tulle and cut 6 in wide and 18 in long strips


Note: ( you will want to measure how long you want it to be.)

For Piper, 18 inches long hits slightly above her knee.


Step 4: once all tulle is cut into strips, begin tying onto elastic, about 4 strips at a time


Like this:


It took me about  18 loops around it to make it to the end.


Piece of cake you're done!


Tie on.. Instant cuteness!


(P walking to Paul)